Showing posts with label Damask Backgrounder. Show all posts

Tuesday, August 2, 2011

~Tune in Tuesday~


Check out Savvy Projects Blog to get more information about my Tune in Tuesday card!


This is one version of the ghosting technique...


I hope you are inspired to stamp and create!

Supplies: Amberley Grace Cardstock V-840 & B-320, Amberley Grace Ribbon B-220, Amberley Grace Hardware B-120, Great Greetings T-3114, Damask Backgrounder T-3276, Transcendence Embossing Powder C-151, VersaMark Pad S-1179, Hydra Sponges F-177, Burnt Umber Palette Hybrid Ink Pad TT-218 (I also used Charcoal TT-219)


Friday, April 1, 2011

Finally Friday ~ The Joy of Easter Cards


April showers bring May flowers ... and Happy Easter Cards! Play along! Share your Easter Themed Card by linking to our linky! When you do ~ you'll automatically be entered in to win monthly BLOG CANDY! Be sure and check out the BeAuTiFuL creations on Savvy Projects Blog!


I hope you are inspired to stamp and create!

Supplies: Damask Backgrounder, I Love Easter, Mega Scalloped Oval, Super Jumbo Oval, Palette Inks: Belle Rose, Noir Black, pop dots


Tuesday, March 29, 2011

Tune in Tuesday ~ Masculine Cards


My friend, Debra, will be sharing MASCULINE cards today~ and you can play along by sharing your card! Link your card to our linky and you will automatically be entered in to win BLOG CANDY!  Join the fun on Savvy Projects Blog!


Similar cards ~ a few variations...


On the damask image: I inked up my image with orange ink...then randomly rubbed a little red ink on the image. I stamped off one generation of ink--so my image would be lighter. The edges are sponged with brown ink.
 

I hope you are inspired to stamp and create!

Supplies: Sophisticated Sentiments, Fancy Curls, Damask Backgrounder, Love & Laughter, Catelynne Cardstock, ribbon, buttons, Palette Ink Pads: Burnt Umber, L'Amore Red, Orangerine


Tuesday, March 22, 2011

FUN with POP UP Cards!


I had a LOT of fun making this card! My friend, Diane Short, taught me how to make this pop up card! There are many variations of pop up cards. I can't remember the last time I made one! Be SURE and check out POP UP cards with my friend, Paula-Kay, on Savvy Projects Blog!


Here is the card before it is completely assembled! You can see that I used double stick tape.


Pop up piece: Score about 1/2" (or a little less) diagonally up from the corner that will be adhered. When you adhere ONLY the small corner of the pop up piece, make sure the bottom of the cardstock is close to horizontal to the bottom of the card. If you "tilt" the cardstock too much as you adhere the corner, it will not pop up right. You may have to adjust it a bit to get it just right! No worries! The bottom of the pop up piece is adhered approximately 2" down from the top of the card. You can easily move it up more ~towards the top of the card~ if you have a bigger saying/image.


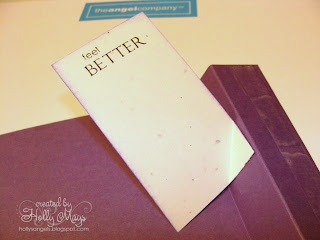
The little piece of cardstock pops up between the two purple pieces of cardstock when you pull the sides~ TOO cute! The damask image on the front of the card is inked, stamped off once, and then the edges of the image are rolled on the ink pad. It's a nice technique that leaves the center lighter~ which is perfect for a saying!


Here is a picture of the top of the card. I opened it up so you could see the top, but I didn't open it enough for the saying to pop out. The card is not closed or open all of the way~ it's between open and closed.


Here is a picture that shows what the card looks like after I have pulled the sides a bit more~ enough for the saying to begin to pop up! You can write a personal message on the back of the card!

Measurements:
(2) Purple Cardstock: 6 3/4 x 4 1/4, Score at 1 and at 1 3/4
Stardust Cardstock: Center pop up 3 x 1 3/4, Front of card 3 x 3 3/4
Black Cardstock: 4 x 3 1/4

I hope you are inspired to stamp and create!

Supplies: Thinking Of You, Damask Backgrounder, Shimmer Brads (B/W), Palette Ink Pads: Iris, Noir Black